This is a short guide illustrating how to connect your Microsoft Office 365 service using an iOS device.
If you run into any troubles that prevent the standard setup procedure from completing successfully; contact your IT expert for help.
Note: The illustrations are with an iOS 7 device, however your experience should be identical or very similar on an iOS 6 or iOS 8 device.
1. Open Settings.
2. Select Mail, Contacts, Calendars, then select Add Account near the top of the right-hand column.
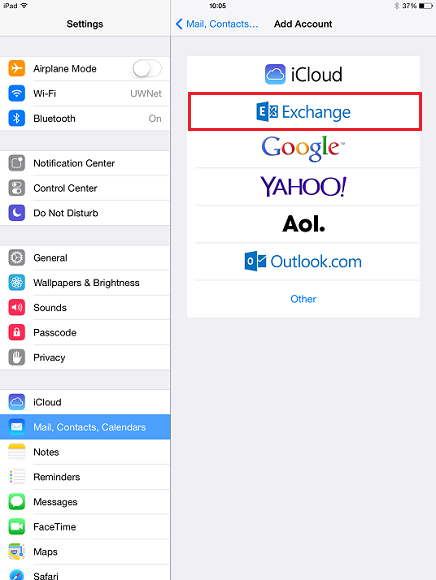
3. Select Exchange.
4. On the account setup window, enter the following for each field:
Email:<username>@<domain_name> (e.g., fred.smith@fredsmith.com)
Password: Enter the password for your account
Description: Give the account any name, e.g., Fred’s Office 365.
5. Select Next.
6. You’ll be directed to the enabled account applications page now. Choose what you’d like enabled.
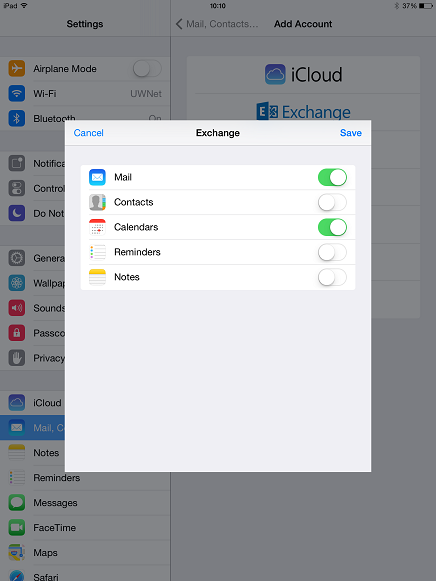
7. Select Save.
8. Select the new account from your list of accounts. It will be listed by the description you chose for it, earlier in step 4.
9. Select Mail Days to Sync and set it to your preference, e.g., “No Limit” if you would like all of the mail in your inbox to be synced to your device. The default period is one week.
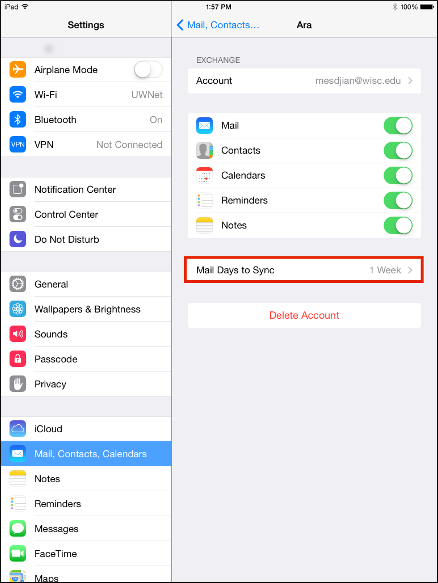
Note: the more mail that is synchronised to your phone, the longer it may take to get all your messages on to the device and the more storage it will consume on your device.
Setup is complete. Email, calendar and contact data (if enabled) will synchronise and will be available in the appropriate applications.